I want to go to YouTube.com to watch cool videos, but how do I do that? I would open an internet browser on a laptop or PC, navigate to the address bar, type www.youtube.com, and press the Enter key. YouTube then appears. It’s something we take for granted every time we use the internet, but this seemingly simple task wouldn’t be easy without a convenient protocol called DNS, or ‘Domain Name System’.
DNS allows end users to type easy-to-remember URLs (Uniform Resource Locator) like ‘google.com’ or ‘youtube.com’ instead of the IP addresses assigned to the servers for those sites. It would be inconvenient if one had to type 142.250.72.238, the IP address of YouTube.com, every time they wanted to visit that site. DNS servers store a one-to-one list of domain names to IP addresses. When a device, such as a PC, first tries to connect to a website like YouTube.com, it must first establish contact with a DNS server where this information is stored. After the PC has contacted the DNS server, it stores the IP-to-URL information in a cache. This information stays on the PC for a few hours until the TTL (Time to Live) expires. If I decide to revisit the same website, my device will need to reestablish contact with the DNS server. Having a cache significantly reduces network traffic to the DNS server that would exist if one visited the same website several times in an hour.
Virtual Hosting
Nowadays, a mere IP address per website is insufficient. It’s more complicated than that. In the early days of the internet, typing an IP address in the address bar was enough to bring up a website. However, today, unless it’s a very basic website, it’s often not specific enough to type the IP address. Many major websites today share a single IP address. For instance, the IP address 142.250.72.238 is shared by YouTube.com and Google.com. This is because both YouTube and Google are owned by the same entity: Google LLC. Typing in ‘youtube.com’ or ‘google.com’ specifies the domain name so the server knows which website you’re trying to reach. If you only typed 142.250.72.238, you’d likely get an error.
To conserve IP addresses, only one IP address is used, and you enter the URL, specifying where the Google server will direct you. It accomplishes this by using a configuration known as ‘virtual hosting’. Virtual hosting is similar to port address translation (PAT). I already discussed PAT in one of my previous articles on this site: Dynamic PAT (NAT) – georgebatton.tech. Going into detail about PAT in this article would be too lengthy, so please refer to the link above if you’re interested. The primary difference between PAT and virtual hosting is that PAT utilizes different port numbers and is implemented on a router.
In contrast, virtual hosting uses the same port and is configured on a server. Instead of ports, virtual hosting uses a single IP address while utilizing different domain names to differentiate the websites. Think of virtual hosting like a single building with many unique rooms (e.g., google.com, youtube.com) all on the same street address of ‘142.250.72.238’.
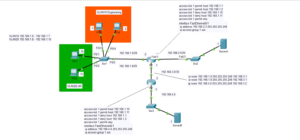
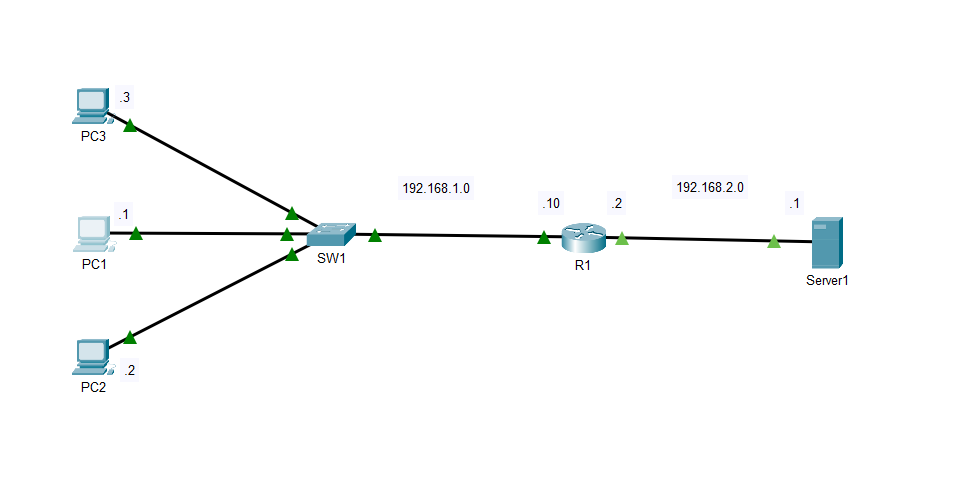
In the lab diagram at the top of this page, I have configured the DNS server with an actual physical server. This can also be done on the router, but I decided to use the router to configure a DHCP server. On ‘Server1’, navigate to ‘Services’ and then to ‘DNS’ to find a list of IP addresses corresponding to each device on the network. This is an ‘A list’. ‘A’ denotes that we’re talking about hostnames corresponding with IPV4 addresses. If we were discussing IPv6, the DNS list would be called an ‘AAAA’ list. If PC2 wants to communicate or ‘ping’ PC1, it can do this if it knows PC1’s IP address.
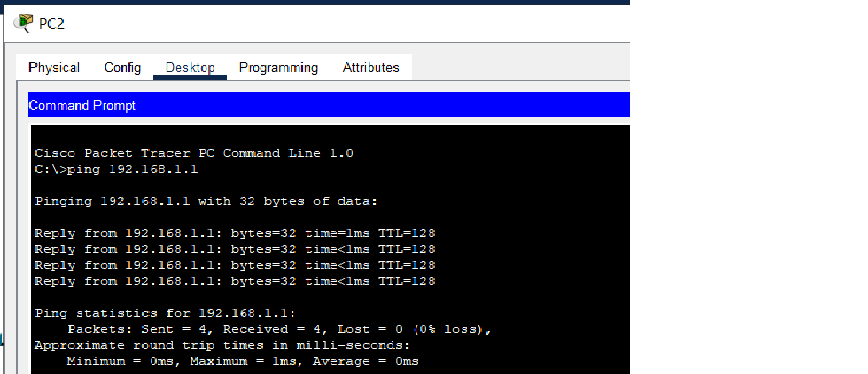
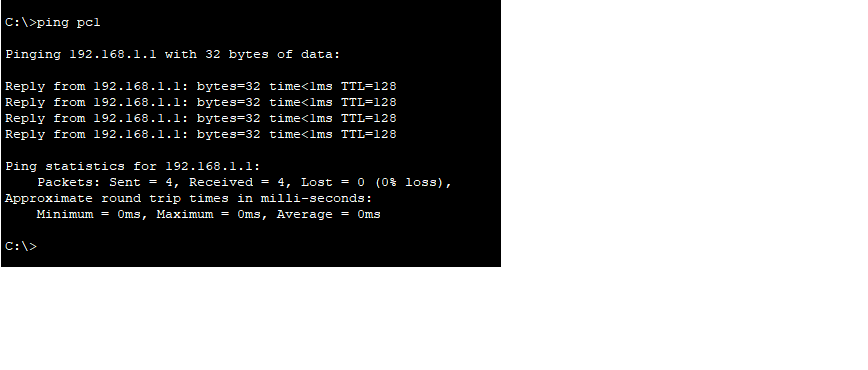
The command in the Windows Command Prompt is ‘ping 192.168.1.1’, as shown in the image below. However, if I’d rather communicate with PC1 using the name ‘PC1’, I need first to configure the IP address 192.168.1.1 to match the hostname ‘PC1’ in the ‘A’ record. When I pinged the IP address, the communication process was significantly quicker than the initial ping to the hostname ‘PC1’. This is because communication within a LAN is limited to communicating with the switch.
To resolve ‘PC1’, PC2 must first communicate with ‘Server1’, which is not only further away but also involves more steps in the process.
DHCP
DHCP, or Dynamic Host Configuration Protocol, is the next topic I would like to discuss. On all hosts in the configuration page, I have configured the router R1 to act as a DHCP server. What exactly is DHCP? DHCP is a protocol that one configures on a server, which automatically or dynamically hands out configuration data to devices on a network. I could have gone to each PC and manually entered its default gateway, DNS server, and host IP address, but DHCP allows me to bypass this tedious process. I have included a screenshot of the running configuration in the Cisco CLI showing the configuration to make R1 the DHCP server. We begin by listing a set of excluded IP addresses.
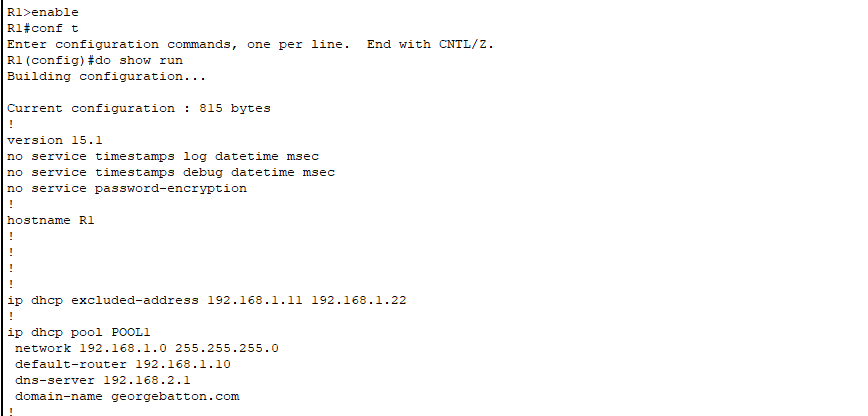
In this instance, the range is 192.168.1.11 to 192.168.1.22. This means we can use the range 192.168.1.1 to 192.168.1.10 for our DHCP pool. All we have to do is create a pool name. In this instance, I called it ‘POOL1’. Creating this pool puts the router in ‘DHCP Pool’ mode, allowing us to configure the range of IP addresses to go into our pool, the DNS server that the hosts will use, and the domain name associated with each hostname in the DNS ‘A’ record. The command ‘network 192.168.1.0 255.255.255.0’ allows us to use any IP address from 192.168.1.1 to 192.168.1.254, provided it is not in the excluded address list.
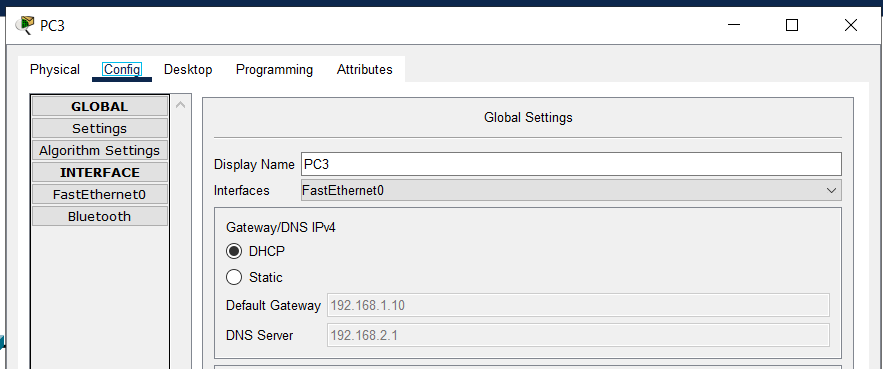
R1 will hand out these IP addresses to any devices on the network, as long as the ‘Global Setting’ on the Windows PC is set to DHCP, as shown in the image below. R1 can also be configured as a DHCP relay agent. This configures it to pass the DHCP request to an external server if the DHCP information is hosted on an external server, rather than on the router.
The command for this is done in interface config mode on the interface connected to the host devices ‘IP DHCP helper address’ and then the IP address of the DHCP server. Beyond this, there isn’t much to explain. The concept is straightforward, but the configuration steps can sometimes be challenging to remember. If you’d like to experiment with the lab associated with this, I have included a link below to my GitHub repository. You will need to create an account and download Cisco Packet Tracer to view the lab. Until next time, have a great day. I hope this lab was helpful.
Link:
georgebatton/DHCP-and-DNS: Router and Server DHCP and DNS Setup